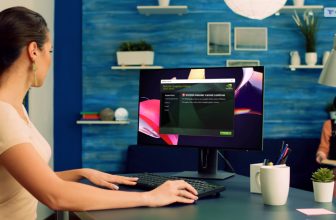
Do you like to know how to take a screenshot on Mac? Then you are in the right place.
In case you are coming from the windows PC, you may be wondering about taking a screenshot minus the print screen key on the keyboard.
The good news is that there are several screenshot methods that are in novel versions of macOS and they include capturing a particular window, all of which produce images that can be used to flaunt high scores or clarify an issue with the supporting tech.
How to Take a Screenshot on Mac:
The use of keyboard commands:
Keyboard commands are very quick and easy as a way of taking screenshots on Mac, whether you want to capture the whole screen or just part of the screen.
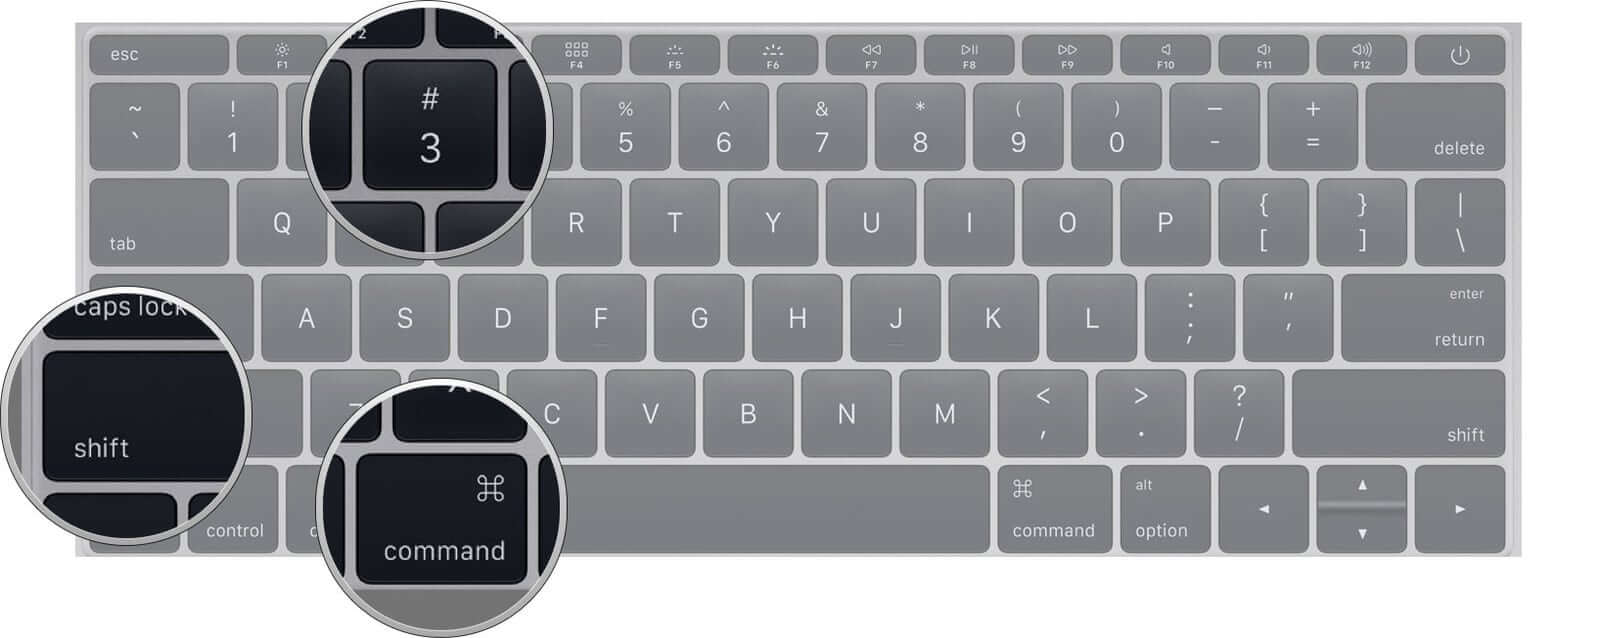
Capturing the whole screen:

When you want to take a screenshot for Mac, the first step is pressing the command + shift + 3 keys all at once. This will save a copy of the screen on the clipboard. You can also press this combination minus the command key so as to save this image on the desktop.
In case you are running the development preview of the upcoming Mojave update for Apple’s macOS, the screenshot preview will be available in the screen corner to give you quick access to tools of editing. It is your choice to take advantage of the novel stacks feature of the screenshot to group the screenshots together.
Capturing selected areas:
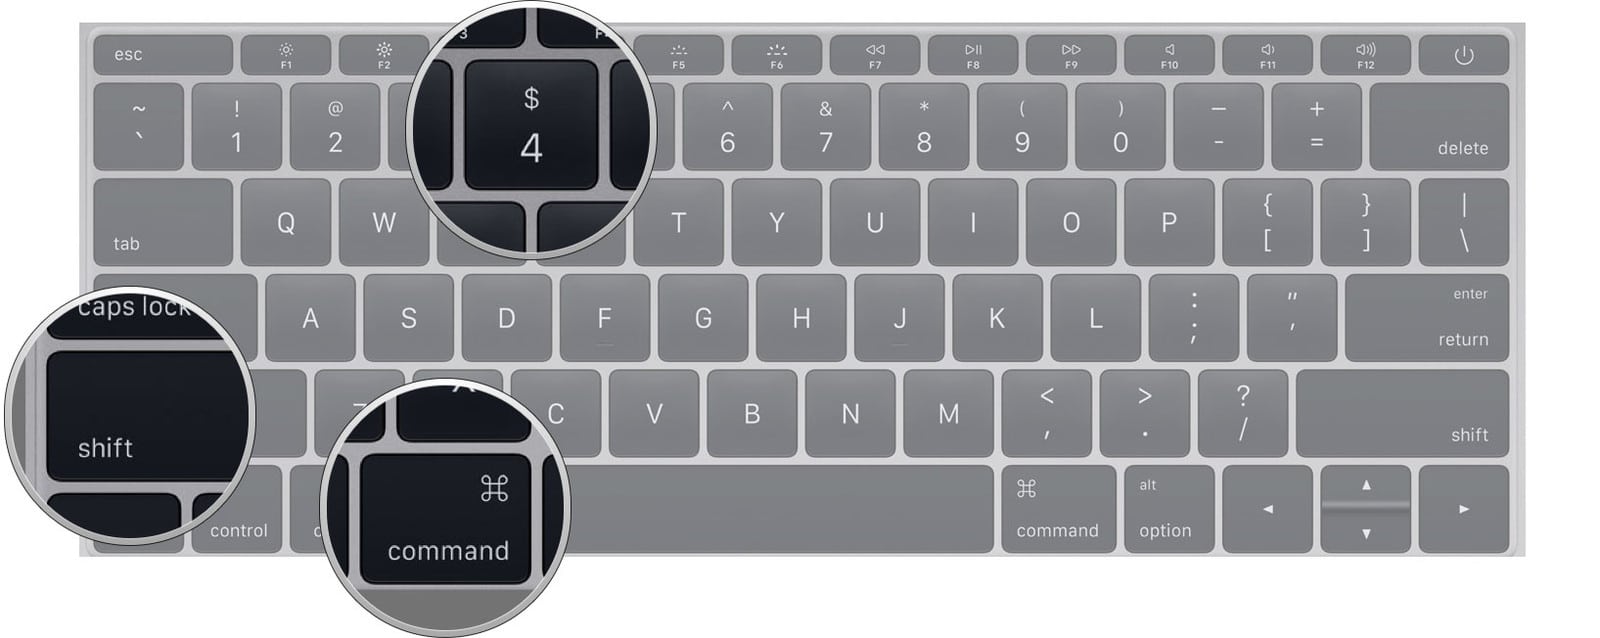
Start by pressing the shift + command + 4 keys altogether. With the assistance of the mouse pointer turned to the crosshair, utilize it to select the area you want to cover. You can then fine-tune the selection by simply pressing the spacebar, which will allow you to take a capture of the full screen or to choose the open menu.
The place you select will get copied to your clipboard. Conversely, for your screenshot to get saved on the desktop as the PNG file, do not press the command key. If you possess and MacBook Pro that has a touch bar; you will get the options on its touch bar including the entire screen, the window, and the selected portion. You may also use it to save the screenshot on another folder like the documents, desktop, and the clipboard. Another exclusive feature is taking the screenshot of your touch bar display, which you can do by pressing 6 + Shift + command to take the shot.
Using grab to take screenshots:
Do not feel like memorizing shortcuts of the keyboard? Grab is a software program that comes pre-installed in the machine and allows you to create screenshots from the menu bar directly. This package also allows you to take time-delayed screenshots when you need to prepare the stage before you capture the image on the display.
Options of grab:
Start this software by going to the utility folder to open it, which is found in the folder of applications. After launching it, you will realize the program icon in the dock. If you wish, you can pin the icon for later quick access. Grab does not just feature the window while open and runs completely from the menu bar. You can either utilize the menu system of capture to take the screenshots you desire or use detailed keyboard shortcuts next to the relevant command.
Timed screenshots:
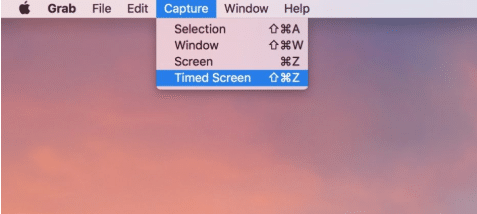
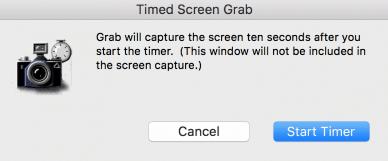
With this package, it is possible to take a screenshot of particular selections on the screen, a particular window, or the whole screen, the same options that were outlined earlier. The only new thing here is the option of the timed screen that gives you a delay of ten seconds before the capture of the screen. This is to means that if you require positioning the mouse or opening the menu in the right position then you have enough time for the same.
Preferences of Grab:
Start by opening Grab as before when you have not yet done. Choose the timed screenshot from its menu or just press shift + command + z. Remember that the cursor of the mouse does not show up by default in the screenshot. If you desire to ensure that it is captured inside the frame, choose preferences from the grub menu and choose the mouse icon from the pop-up window.
The cursor will show up when there is delayed capturing of screenshots, which is well because you will require the mouse to get the screenshots and other options. The shortcuts of the keyboard are better options for capturing screenshots, but if you do not have the desire of memorizing things, grab is the best alternative.
Use the preview to take the screenshot:
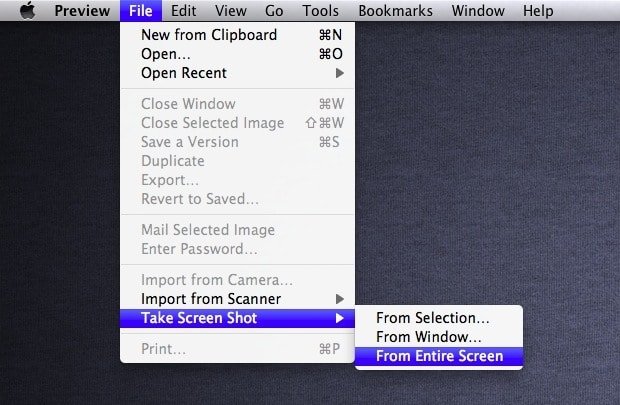
A preview is a default tool that allows you to open all things from PDF files to photos on the Mac and it has other hidden aspects. It is possible to edit images with preview, for example, by simply clicking the icon of the toolbox. This aspect also captures screenshots.
To take screenshots, open preview, select file found in the menu bar, and then from the menu, choose from the entire screen, from selection, or from the window, as per your preferences.
It is preferred to take the shortcut of the keyboard to this method since the former is quick, but preview offers one advantage; it is possible to choose the destination of the screenshots. Other options on the list save the screenshots on the desktop with the verbose filename. The preview will open the screenshot and allows you to make several edits, and you will then save the file at the destination of choice. Preview is a solid choice in this matter to you.
Take and save Mac screenshots:
What will happen after taking the screenshot? Making an assumption that you did not just send it to your clipboard, the Mac will time stamp the screenshot automatically with the exact time and day when it was taken, which then saves a PNG on the desktop. This is crucial for immediate reference, but in case you are taking several screenshots at once, then the desktop will get clattered with items sporting odd names.
The solution is that you have to move to trash the screenshots whenever you are done with them. However, if you are working with various screenshots, this may be very tiring. The good news is that you can make modifications through third-party MacOS software and terminal commands.
Conclusion:
Take, for example, tiny for mac app. This software will rename the screen automatically based on the first application window. In case you are using chrome or safari, it will include the title and URL of the active tab. This can help with planning when you are juggling several images at once.
Alternately, in case you are running your preview build called Mojave, there are quick and new editing tools you can use to take advantage of the saved screenshots automatically on the desktop. They get grouped to declutter things. When they seem as thumbnails in the screen corner shortly after taking them, you click on the images to edit them via the Markup app.
Read Also :