Screen recording is a beneficial feature that helps you record screen audio and video for future use. You can record any kind of video, whether a tutorial, hack, presentation, movie scene, or entertainment video. Later, you can convert it into your desired format to save on your device.
A wide range of screen video recorders is available in the recording world to make the screen recording smooth and super-convenient. However, we found TunesKit Screen Recorder more reliable due to its top-notch built-in features and easy-to-use layout.
All-in-all, the cutting-edge elements of this software and user-friendly interface make it an incredible choice for both beginners and experiences.
Let’s jump ahead and figure out what else this easy screen recorder offers to you!
Is TunesKit Screen Recorder Worth Install for Screen Recording?
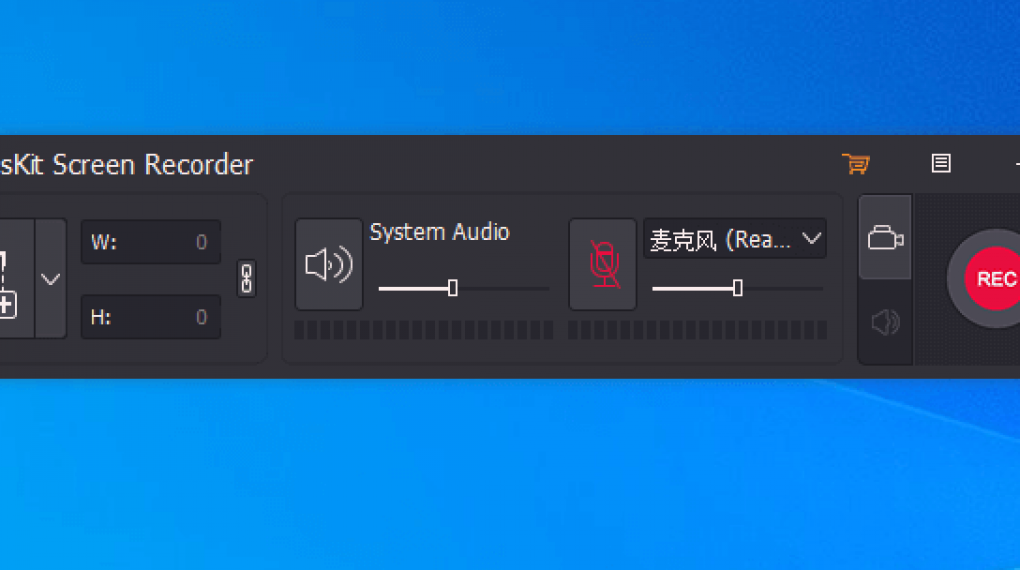
TunesKit Screen Recorder is an all-rounder screen recorder with the latest recording technologies that allow you to record video and audio from a webcam, microphone, or screen. TunesKit Screen Recorder is a flexible software that allows you to record only audio or video or go with both options at once.
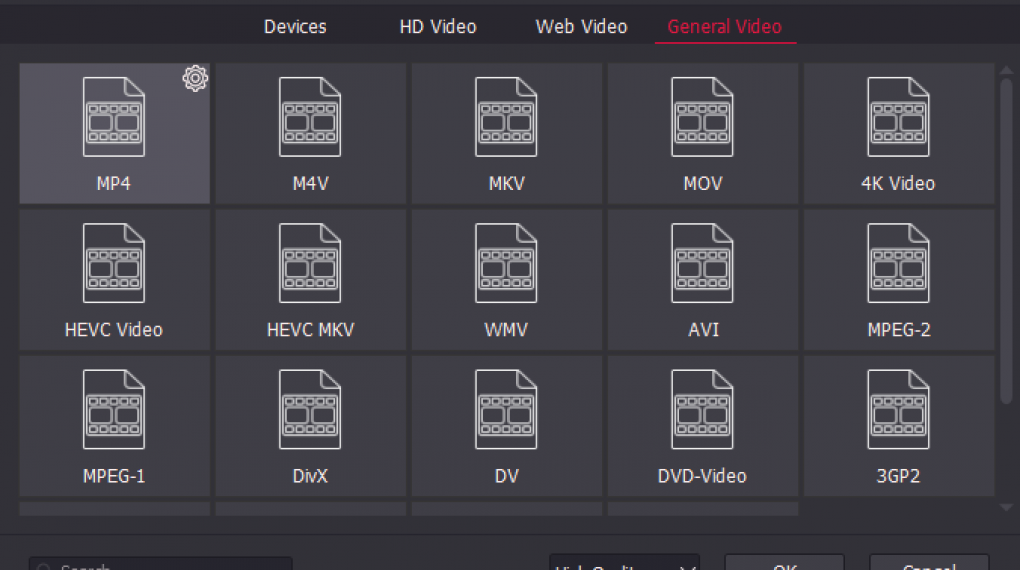
Besides recording, you can save the recorded video in any valid format, such as MP4, MPEG, M4V, WMV, 3GP, MKV, MOV, WebM, or 4K HD video format. If, in any case, you want to improve the video finishing, you can use the editing tools of TunesKit Screen Recorder.
The TunesKit Screen Recorder editing tool supports you to trim the video clips, incorporate titles, artist names, and genres, and rename the recorded audio and video.
Some Unique Features of TunesKit Screen Recorder
- TunesKit Screen Recorder is not partnered or shared with any other screen recorder or thor party; it is an independent software to record high-quality audio and videos.
- Instead of manually monitoring the recording, you can use its time scheduler to set the starting and ending times.
- Users get multiple options to use the video; they can record, save, share, and upload the videos to any social media platform.
- The resolution setting is also commendable; you can record the videos with high output resolution – up to 60 frames per second.
- It features a screenshot tool to save the images in JNG, PNG, and other formats. Similarly, videos can also be recorded in almost every format.
- Users can also preview the audio or video file while recording.
How To Use TunesKit Screen Recorder?
If you want to use the TunesKit Screen Recorder, you are supposed to download its authentic version from its website. Have you ever wondered how to screen record on windows with audio?
Then the next steps are also the same. Below is the procedure for downloading and recording the screen:
Overview:
- Download and Run TunesKit Screen Recorder
- Select Audio and Recording Area
- Customizing the Recording Parameters
- Begin Your Recording
- Preview, Edit, And Save The Recording
1: Download and Run TunesKit Screen Recorder
The first step to begin the screen recording is downloading the software from the website and then launching it by double-clicking.
Once the software is launched, you can open the primary interface for video recording and customized editing. You can also use the other modes of the interface that serve you for other purposes – recovering lost data, editing videos, unlocking iPhone passwords, etc.
2. Select Audio and Recording Area
Luckily, you don’t need to perform tons of steps to begin the video recording through TunesKit Screen Recorder. After installing the software, you can select the platform to start the editing and press the “+” button.
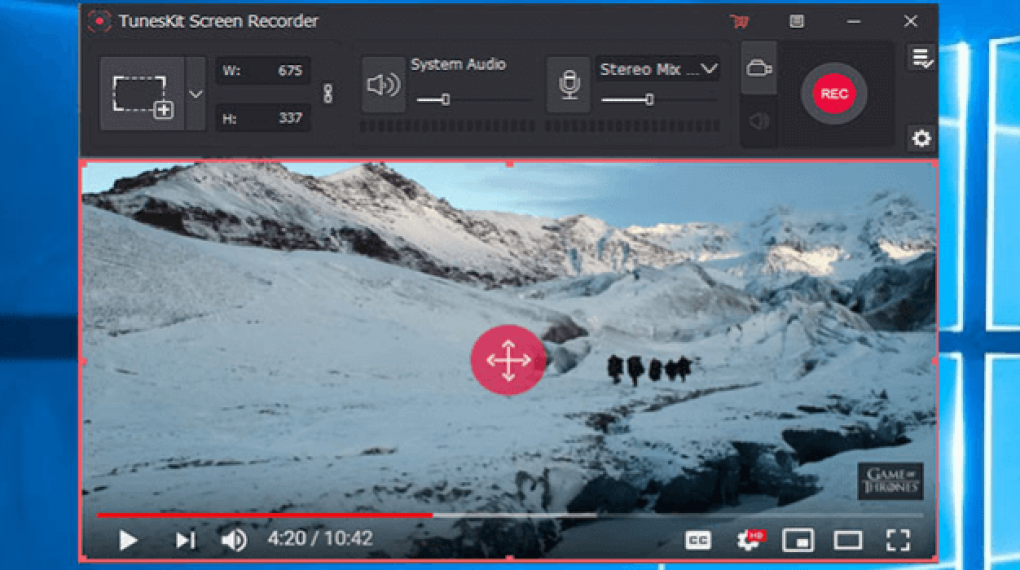
Find a drop-down button to choose the recording size of the video. You can record the entire screen or pick the resolution 480*320 or 960*540, according to your needs.
3. Customizing the Recording Parameters
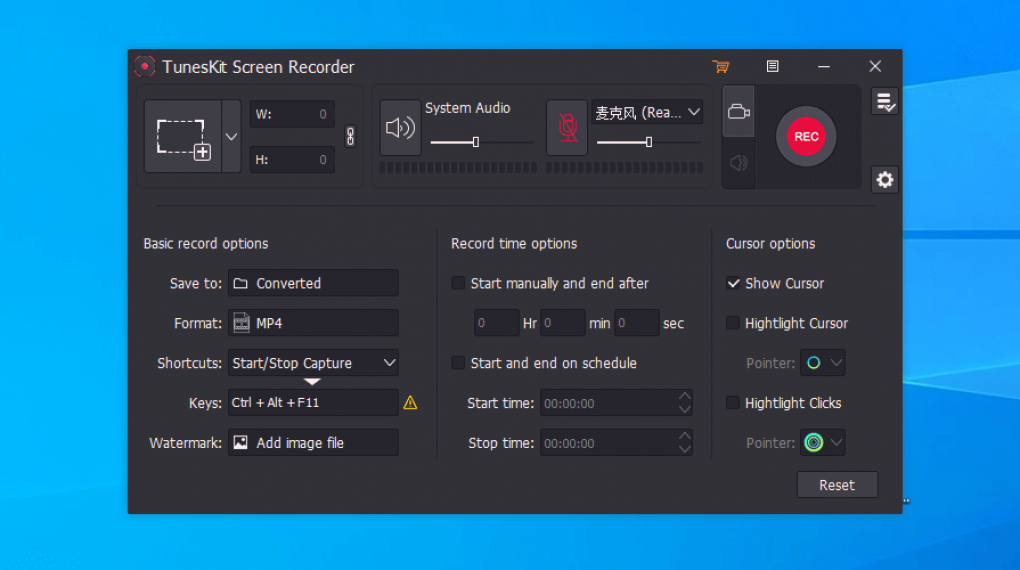
Thanks to TunesKit Screen Recorder for being a complete video recording package; it also offers you options to customize records depending upon your requirements and standards. To customize the recording, you can tap on the Setting Icon that will lead you to an area where you can choose basic options before starting the recording.
4. Begin Your Recording
Here comes the foremost step – tap the recording button, and the video recording will begin to capture the screen. This powerful and well-integrated editing tool also allows you to pause and restore the recording at any time. In addition, cutting, editing, and the option to merge the video are also available.
5. Preview, Edit, And Save The Recording
The video recorder will automatically record your video and offer you the option to figure out whether it is recording according to your preferences or not.
As already discussed, you can now edit the recorded video, split it into parts, cut its unrequired pieces, or merge different recorded clips.
Once the video is edited according to your standards of professional requirements, you can give a name to the video and then save it at its destination.
Pros and Cons of TunesKit Screen Recorder
Pros
- Enables you to extract audio from video
- It supports every audio and video running on the screen
- Easy to use tool with a user-friendly recording interface
- It offers excellent compatibility with different Windows operating system
- Allows you to transfer the recording to any portable device
- The free version helps you experience it before purchasing the premium one
Cons
- It does not support Linux Version
- Its free version comes with the watermark
Our Summary
Screen recording is a regularly performed task; hence, you require trustworthy software to get it done effortlessly. So, instead of messing with tricky or unreliable software, you can directly give a hit to TunesKit Screen Recorder, which is literally an easy screen recorder. Along with screen recording, you can also use this multimedia as a video cutter, video converter, video repair, etc. In short, you will not get disappointed by its performance at any phase!
Additionals:


