So, you’ve decided to use cPanel for your web hosting needs? Well, get ready for an interesting ride, as there are so many things you can do with this LINUX based control panel – which puts it above other LINUX based CPUs.
However, if you are new to the world of web hosting or cPanel, you would need to understand the basics. Even though cPanel has an easy -to navigate, use, and understand interface, it will probably take you a couple of days or weeks to fully grasp the basics.
This is why we’ve compiled this beginner’s guide to help you master the basic of cPanel settings:
1.Getting Started – User Settings:
cPanel comes with a feature that allows you to add multiple users (employees/business partners) to help with the running of your website. Adding a new user is simple, all you have to do is:
- Go to the “user manager” option on your dashboard and you’ll be redirected to a screen that you can use to add new users.
- Input the full name of the new user, and other relevant information such as their email and a preferred username.
- Create a strong and dynamic password for the user.
- Then assign permission setting for the new user – there is a service section where you can do this – you can either give an unrestricted quota or a restricted quota on FTP and email services.
- Proceed to the web disc section, where you also need to select either a ‘read-only’ or ‘read-write’ access for the new user.
There are three different icons that cPanel uses to indicate permissions provided to each user. They include:
- A disk drive icon that denotes a user has access to your website’s web disc services
- A mail envelope icon that indicates a user has an email account connected to your website.
- And a delivery truck icon that indicates that a user can access FTP (file transfer protocol)
Use these icons to ascertain the type of permissions you have granted to each user.
2. Getting Started – Password Settings:
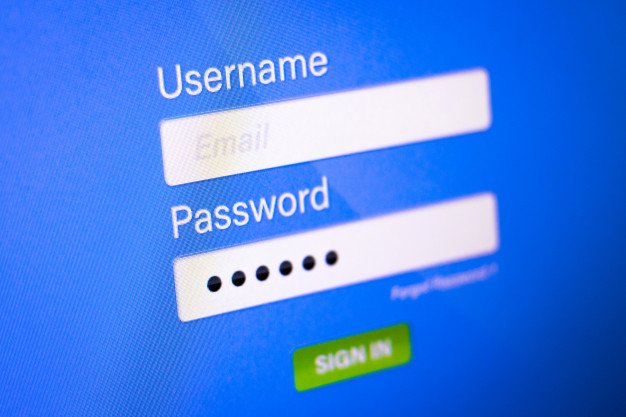
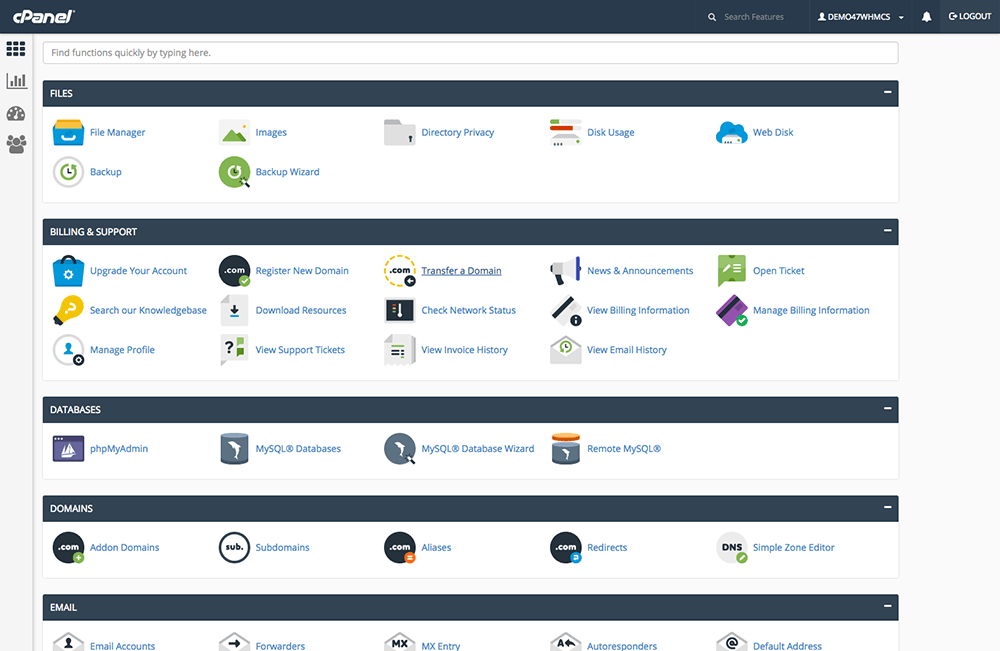
In order to secure access to your cPanel interface, you will need to change your password regularly. To do this, you will need to access your Cpanel dashboard – which can be done from your domain URL. For example, http://domain.com/cPanel
On your dashboard in cPanel, you are provided with a lot of functions. At the top right corner, your username is displayed. Click on it. There will be a drop-down menu, where you can see password and security as the first tab. Click on this tab. Now you can change your password via the password and security wizard. You would need to input your new password and current password. Once you’ve done that, click on the “change your password now” button. A great way to create a strong password is to use the cPanel password generator. It is also good practice to read the tips provided by the cPanel team when creating a new password. At this point, you can also activate the digest authentication option(which is for sites who don’t have SSL). If you have SSL from a certification authority, then you wouldn’t need the digestive authentication option.
3. Getting Started – Notification Settings:
CPanel requires a secondary email as a backup. By default, the primary contact is the user’s registered email. You can quickly update your secondary email under the contact info tab (cPanel-preferences-update contact info), input your secondary email as a backup in the event that your primary email cannot be reached.
We recommend that you subscribe to monitoring tools available online, so you can track your domain and website availability. Although some web hosting providers offer these services free of charge, you might want to consider external monitoring tools for more accurate reports. Remember to configure the monitoring tool to send alerts immediately. Sites like http:///www.siteuptime.com and http://www.monitor.us, provide free monitoring tools that are location specific.
4. Getting Started – Server Security Settings:
If you care about good server functionality, then we recommend that you take extra safety precautions. Thankfully, with cPanel, you can increase the protection of your cPanel account, domain, and website. A great place to start is with guarding against spam. Although new websites are not spammed for some time, we advise that you enable spam filtering service to address the problem before it begins.
It is also good practice to choose the option of discarding all unrooted mails (mail-default address), in order to better protect you from hackers and spam attacks. As an extra precaution, disable MS
FrontPage (advanced-front-page extension). Microsoft office has stopped working with a front-page extension on UNIX platforms because of the many weaknesses in its structure.
Don’t forget to enable hotlink protection which will guard against bandwidth loss (security-hotlink protection) and allow your sites to utilize static content images including.BMP, JPEG, PNG, and GIFs.
5. Getting Started – Backup Settings:
There are two backup sections in your cPanel dashboard – partial backup and full backup. The later will create a zipped copy of all your site’s data and your cPanel account (full backup). Partial backup, however, will allow you to download separate items such as your home directory, databases, email accounts, and so on individually. To backup, your files, click on the “backup” bulletin on your homepage and select either partial or full backup. After selecting your backup option, you would need to select a backup destination – leave it as “home directory”, if you don’t have a remote FTP server.
Keep track of the size of the disk space that you are using, so you know when to either delete or compress large files. By clicking on the disk usage icon, you can see the different sections on your file manager and how much space each is using.
6. Getting Started -Mail Accounts Settings:
You would first need to verify your primary address used by cPanel to notify and contact you. You can modify or check this information by clicking ‘update contact information’, in the ‘preferences’ tab. Then click on the “cPanel mail count” tab to manage the various email accounts linked with your website or domain name.
The control options include: blocking unwanted spam and emails, deleting accounts, using autoresponders and filtering, or setting forwarding addresses from those accounts.
7. Getting Started – PHP Settings:
In cPanel, you can configure directives such as allow_URL_fopen, error_log, and so on and disable or enable PHP extensions.
With this feature, you won’t need to maintain and configure custom php.ini files. Instead, you can directly control PHP settings from cPanel.
If you would like to change your PHP settings, follow these steps:
- Log into cPanel.
- Go to the software section on the cPanel dashboard and click on the ‘select PHP version’.
- From the drop-down menu, select your preferred extension for your current PHP version.
- Then check the box next to the extension name to enable it.
- Uncheck the box next to the extension name if you want to disable.
- Then click on the save button to save your extension settings.
8. Getting Started -File And Directory Permissions Settings:
Every cPanel hosting account comes with its user’s home directory under – /home/(username) by default. The directories and files under the user’s home directory should be used on the corresponding ownership and permission. It is very important that public_HTML runs under the correct ownership and permission.
Don’t know how to manage PHP? Follow these steps:
- Under the public_HTML directory, create a PHP info page.
- Through your browser, access this page and check the ‘server API’.
- If it shows CGI/fast CGI, then the PHP handler is CGI, SU PHP, or fast CGI. A lot of web hosting providers use SU PHP because it is a default handler for cPanel servers and for security verification. Under SU PHP, PHP performs as a different function along with Apache. All file permissions should run under 644, and directory permissions under 755. Permissions higher than this will cause “internal server error” when the PHP scripts are running.
- If the server IP value is Apache 2.0 handler, it means PHP runs under DSO. Which does not require any districts file ownership or permission because the PHP file is totally handled by Apache?
9. Getting Started -PHP Version Settings:
Most hosting providers support multiple versions of PHP. If you would like to change the PHP version on your account, then you would need to:
- Log into cPanel
- Go to the software section on your cPanel dashboard and click on-select PHP version
- If you cannot select the PHP version in the software section, it means that your server does not support this feature. Refer to article 7 in this piece for more information.
- CPanel shows the current PHP version. To change this, in the PHP version list box, click on the version that you would like to use and then set to current. Your new PHP version will be applied immediately.
10. Getting started- Redirect Settings, Subdomains, And Domains:
Of course, there is no other place you would find the settings for redirects, subdomains, and domains but under the “domains” tab. Under this tab, you can do a lot of things; create and administer subdomains like support.by site.com or marketing.my sites.com.
You could also manage domain redirects. For example, all visitors going to www.great product, are automatically redirected to marketing.my sites.com or www.mysites.com.
You could also manage DNS (domain name server) records under the domain tab.