
Have you finished the main quests of Horizon Zero Dawn? Are you up for having some more great quests with Aloy in a new, frozen hellscape called The Cut? Then this Horizon Zero Dawn walkthrough for the Frozen Wilds DLC is a must read to complete it without hitches.
Start reading below to learn what to do every step of the main story of this DLC.
Horizon Zero Dawn Frozen Wilds Walkthrough: Main Quests
The Frozen Wilds quest line is in a new region not yet to be added to your map, known as The Cut. You can start the main questline here by interacting with any of these three NPCs who will direct you there:
- Yariki: You can find her north of the Grave Hoard region. This area borders the southern borders of The Cut.
- Rhavid: This NPC can be found just southeast of the Meridian, exactly at the border between the forest and the city.
- Ohtur: This NPC can be found just southeast of the Daytower, exactly at the fort between the forest and the city.
1. Into The Frozen Wilds
Minimum Recommended Level: 30
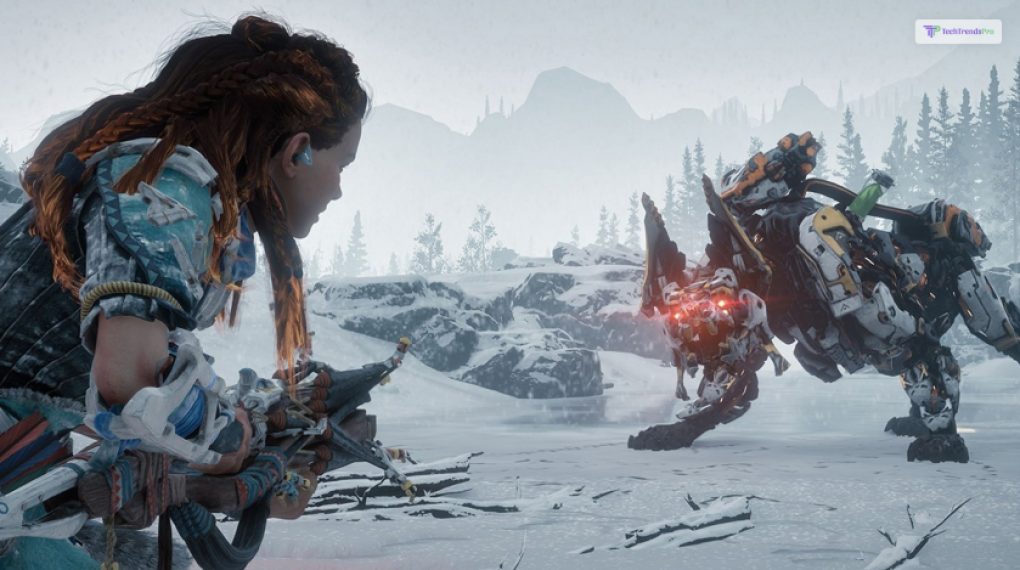
The entrance to The Cut is just north of the Grave Hoard region. You will need to pass through a region called the Mountain Pass to reach The Cut. Here, you will face off against a new machine called the Demonic Scorcher in the middle of a pond.
You can easily defeat the Demonic Scorcher by dodging its lunging attacks. When you get the opening, shoot frozen arrows or rope caster arrows to slow it down before meleeing it. It’s best to keep your distance from the Scorcher.
After defeating it, you will have lots of supplies in the aperture in the pond it jumped from. Finally, you will be greeted by Banuk for a cutscene. He will welcome you to the new The Cut region, which you are free to explore from here on out.
Read More : All The Uncharted Games, Ranked From Best To Worst
2. The Shaman’s Path
Minimum Recommended Level: 30
Completion Rewards: 1x Stormslinger, 1x Extraordinary Reward Box, 6x Bluegleam, 10,000XP
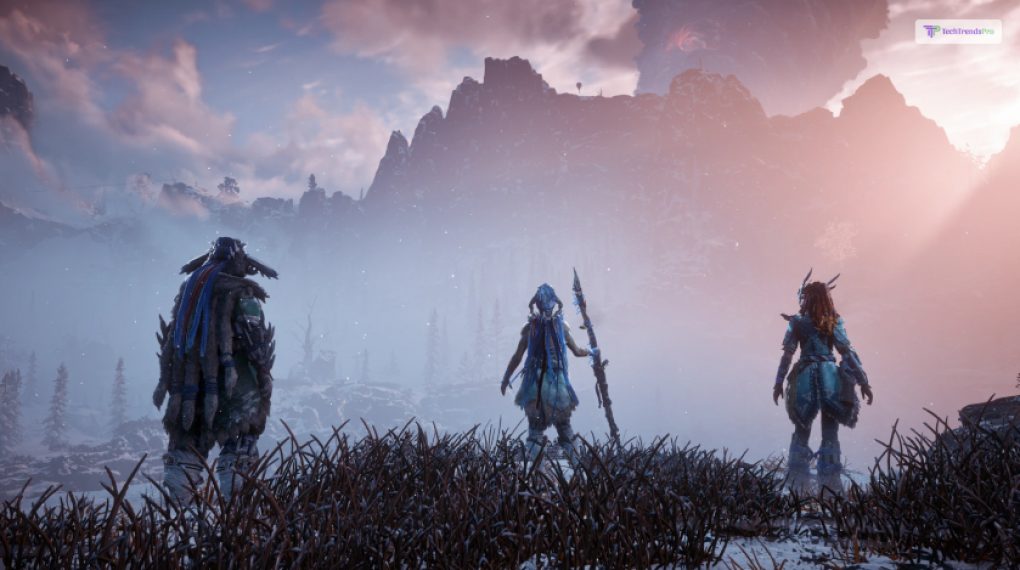
After the opening cutscene, you must follow the quest markers to talk with Aratak. She will explain to you what’s happening in The Cut regarding this “Daemon.” She then tells you to find the tribe shaman Ourea, who is currently hiding.
However, you need first to find her apprentice, Naltuk. As soon as you find him following the quest markers, he will task you with destroying Corrupted Towers. You can either blow up the fire tank of the tower or override it by climbing it. Destroy it before taking on corrupted machines, as doing so will stun and weaken them.
Soon, Naltuk will say that Ourea is going through a trial called the Shaman’s path, filled with windy bridges and waterfalls. Follow the markers to go to the end of this path to fight three Demonic Stalkers. But, if you think the worst is over, this is just the beginning.
At the end of this path, you will face off against the boss called Frostclaw. First, destroy the tower beside it to damage it. Then, use slingshots and fire arrows to shoot its weak spots – its belly and shoulders. Beware of its charge attacks and snowball throws.
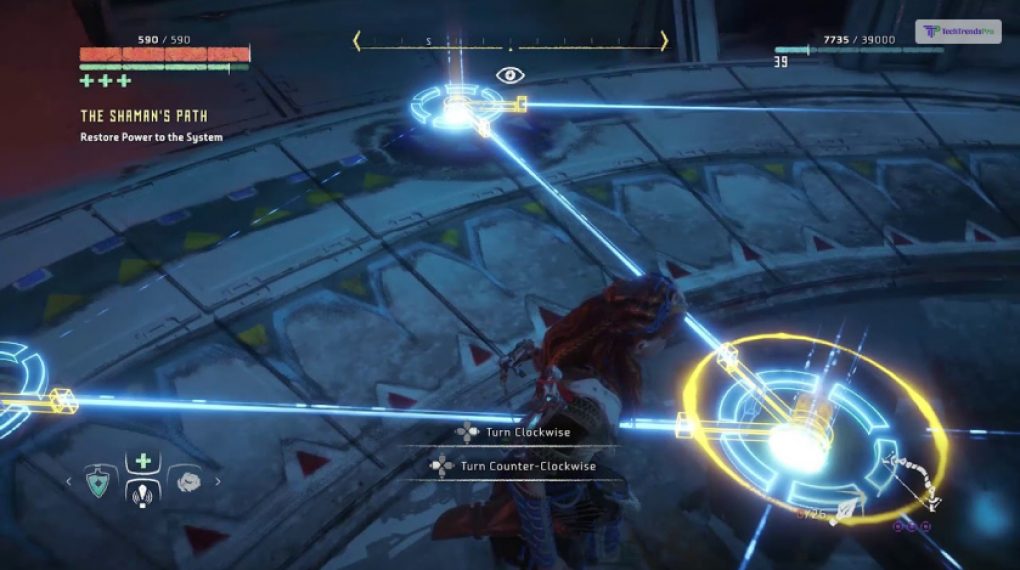
Finally, you can venture inside the facility here and complete the puzzle by powering up the power node. Travel through the vents to power it up. In the end, you will unlock the bunker door and meet Ourea inside. Talk with her to trigger a cutscene and complete the quest.
Read More : How To Beat Mohg, Lord Of Blood?
3. For The Werak
Minimum Recommended Level: 35
Completion Rewards: 1x Banuk Icerail, 1x Extraordinary Reward Box, 8x Bluegleam, 1x Chieftain Outfit, 13,300 XP
In the previous quest. Ourea tells you that the Araratak has taken over the Werak Tribe. Now, it;’s your time to gain recognition and take it back by completing four objectives, doable in any order. These quests are:
Challenge The Hunting Grounds
In the Hunting Grounds, you must prove to be a worthy warrior by completing two out of the three challenges. The final challenge is undoable now, and will unlock later on. The two doable challenges are:
- Onslaught: Your objective here is to defeat waves of machines under a time limit.
- Control: Your objective here is to defeat waves of machines under a time limit using the Stormslinger weapon.
Clear Out The Bandit Camp
There is only one bandit camp in The Cut that you need to clear out. It has two levels.
- Level 1: Here, you will face off against multiple human grunts. However, sneak in first and disable the nearby alarm system so as not to get overwhelmed by reinforcements.
- Level 2: You will only find the boss of the camp here. He uses a long-range flamethrower, which can do lots of damage if it connects with you. You can use fire arrows to shoot the fuel tank on his back. Or, you can slow him down with ice arrows for quick melee attacks.
Override The Tallneck
The third task that you can purisen in this Horizon Zero Dawn walkthrough is to override the massive Tallneck. These Tallnecks are machines you can override to unlock more of the map.
However, the Tallneck here is inactive since three of its parts are missing. You will find all three of them nearby, guarded b y machines like Scappers and Glinthawks. Defeat them all to retrieve the pierces and reactivate the Tallneck.
Help Sekuli
Sekuli is a friend of Ourea and needs your help badly. As a painter, she needs you to collect nine different pigments. These are all marked on the map and you simply need to take care of a few enemies on the way to collect them all.
Challenge Aratak
The final part of this quest is to challenge Aratak, the Werak chieftain. You can do so after doing two of the four quests explained above. Here, you also need to complete four smaller quests.
The first challenge is to race up the mountain under a timer. After you have done so, you will need to fight lots of machines and clear out waves of them. This includes fighting two Bellowbacks and other smaller enemies. Using your Flamethrower and Stormslinger is a good strategy here. After you are done defeating each wave, light up the balloons near it.
The final challenge takes a twist as you and Aratak team up to fight a group of three Frostclasws. Focus on one of them at a time, using slingshot with fire arrows to damage their weak points.
After you defeat the last Frostclaw, Aratak will declare you as the new Chieftain of the Werak Tribe.
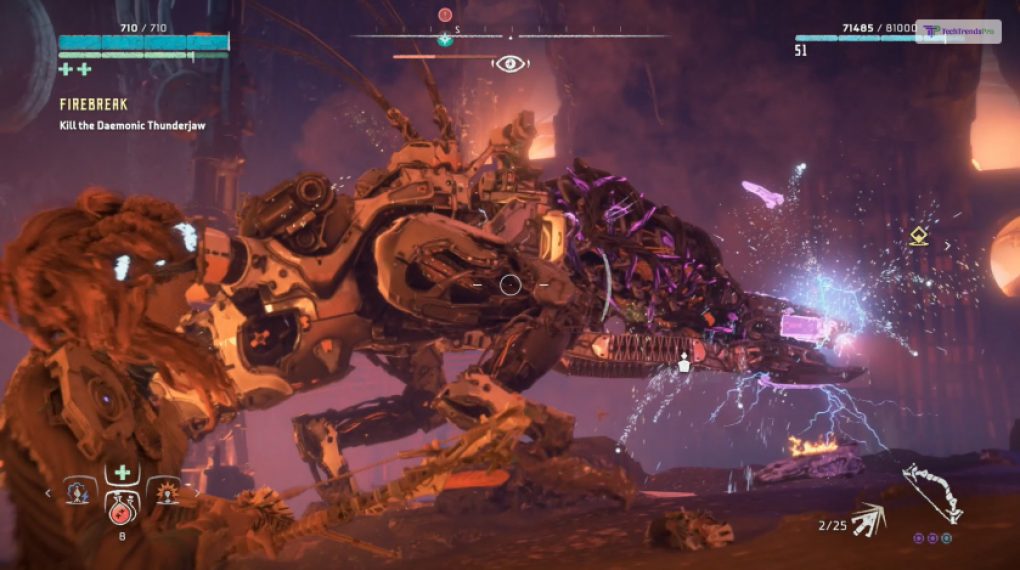
4. Firebreak
Minimum Recommended Level: 40
Rewards: 1x Extraordinary Reward Box, 3x Bluegleam, 16,670 XP
Here, you need to start this quest by heading to Thunders Drum. At its base in Longnotch, you will see a cutscene with Aratak and Ourea.
Soon, you will need to navigate a long way to head inside the only Cauldron of The Cut. Before you can enter it, I would highly advise you to sharpen your stealth kills. There are lots of enemies here, who can all overwhelm you pretty easily together.
These include several Bellowbacks, Demonic Scrappers, Demonic Scorchers, and two Demonic Redeye Watchers. In case you suck at stealth, use your Banuk Icerail to slow them down, and your flame arrows to finish them off.
As you reach the gate of the Cauldron, you will need to face off against a huge Demonic Thunderjaw. Freeze this monstrosity and decimate it with your flame weapons.
5. The Forge Of Winter
Minimum Recommended Level: 40
Completion Rewards: 1x Extraordinary Reward Box, 7x Bluegleam
This is the final quest in this Horizon Zero Dawn walkthrough for The Frozen Wilds DLC. As you defeat the Demonic Thunderjaw, you will be able to enter the Cauldron.
The first part involves creating a bridge by dropping down crates from top. You need to navigate around the area to do so, with only a handful of small enemies in your way. However you have Aratak and Ourea as allies. With their help, defeat the bigger enemies like the Demonic Watcher and the Demonic Shell-Walker.
As the bridge is created, Aratak will blast the gates to the next room. Here, you need to spear to meet with CYAN, the spirit Ourea is after. It appears that CYAN is corrupted by the evil Daemon. Your task – free it from its evil clutches.
Now, you will enter a Frostclaw production factory, where you need to fight various Frostclaws and a few Watchers. There are also various supply crates that you can loot to get great resources. Here, you will also need to create another bridge, similar to the one you created before.
There are various platforming sections in this room. Your task is to hop on top of the Tallnecks head and override it. This will allow you to create a bridge (yet again) for Aratak and Ourea. In addition, you need to dispatch a few watchers along the way.
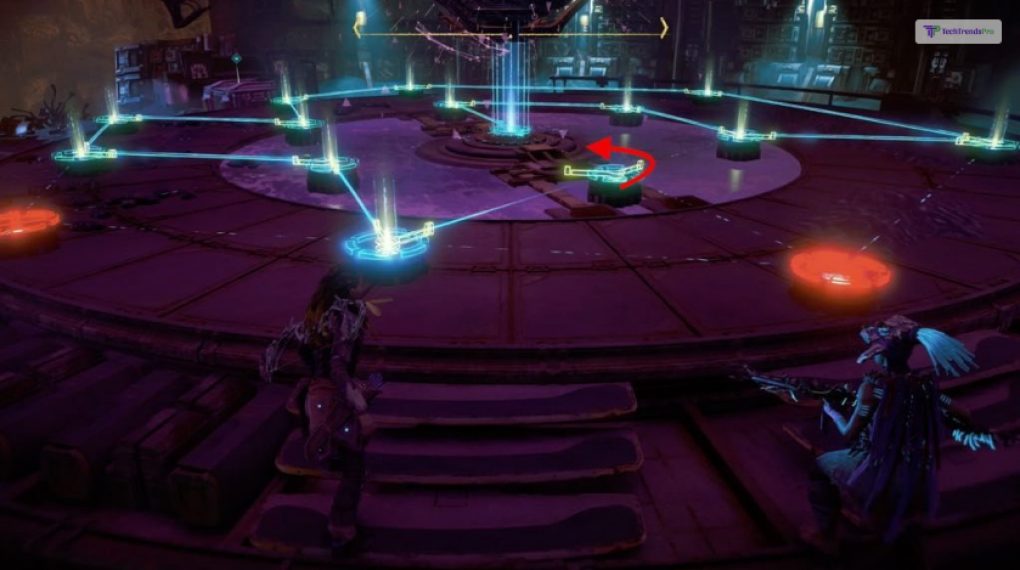
Now, in the new room that you enter, you will find a Node puzzle similar to the one you previously found on the Shaman’s path. To solve it, you need to connect the beam of flights together. After you have done so, it’s to face off against the final boss – the Fireclaw.
This is like a Frostclaw, just much bigger and faster. It has the same weak spots as the Frostclaw – its belly and shoulders. However, it’s best to use Ice Weapons to damage them greatly. Even with Aratak and Ourea by your side, this will be a long and tough fight due to the large health of the Fireclaw.
In addition, there will be several towers that pop up in the middle of the fight to heal the Fireclaw. Ourea will notify you when these towers appear. Destroy them first and continue the fight.
After the fight, a cutscene plays out where CYAN destroys the Cauldron. Finally, speak to Ourea and Aratak outside to finish the quest and put an end to this Horizon Zero Dawn Frozen Wilds Walkthrough.
FAQs (Frequently Asked Questions):
Gamers have many questions related to the Horizon Zero Dawn walkthrough Frozen Wilds. The answers to some of them are:
No, you don’t need to complete the main storyline of Horizon Zero Dawn to start playing the Frozen Wilds DLC. However, it’s recommended to do so since most levels feature high level enemies.
In the quest Mother’s Heart, you will need to talk to many NPCs to gain more knowledge. You simply need to follow the quest markers and talk to the NPCs at Rost. Then, you need to attend a Blessing Ceremony in the end.
To override any machine in the game, you need to complete its prerequisite dungeons in the form of Cauldrons. At the end of the game, you will get the option to override the machines, including one for Scra.
Welcome To The Frozen Wilds
After reading this Horizon Zero Dawn walkthrough, you should be fully prepared to tackle the main story quests for the Frozen wilds DLC now. Therefore, pack your bags, refill your quiver of arrows, and head out into The Cut to complete this story of Aloy!
Read my other posts here at Tech Trends Pro to get more such walkthroughs and game guides!
Read More