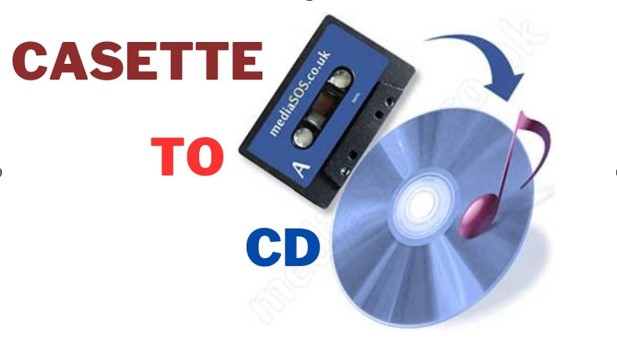
Do you have a collection of cherished cassette tapes that you’d like to listen to again, but you don’t have a cassette player? Or maybe you’re worried about your tapes degrading over time and losing your precious memories. Well, don’t worry, because the solution is simple: transfer your cassette to CD!
In this article, we’ll provide you with a step-by-step guide on how to transfer your cassette tapes to CD. We’ll cover the necessary equipment and software needed, as well as the process involved in converting your cherished cassette tapes to a more modern and easily playable format.
● Transferring your cassette tapes to CD is a straightforward process.
● You’ll need a cassette player or deck, a computer with a CD burner, and audio recording software.
● Cleaning and preparing your cassette tapes properly is important before starting the transfer process.
● Recording your cassette audio, editing and enhancing it, and burning it onto a CD are the essential steps to complete the transfer.
● Properly preserving and archiving your cassettes ensures that you can enjoy your memories for years to come.
Gathering The Necessary Equipment
Before you begin transferring your cassette tapes to CD, it’s important to gather all the necessary equipment. Here are the things you need:
| Equipment | Why You Need It |
| A cassette player or deck | To play your cassette tapes. Make sure it’s in good condition and has a line-out connection for recording. |
| A computer with a CD burner | To burn the audio onto a CD. Any computer with a CD burner will do. |
| Audio recording software | To capture the audio from your cassette tapes and save it to your computer. There are many free and paid options available online. |
If you prefer not to do it yourself, you can also seek the services of a cassette-to-CD transfer professional. There are many companies that offer this service, and it’s a convenient option if you don’t have the equipment or time to do it yourself.
Setting Up Your Equipment
Before you begin transferring your cassette tapes to CD, you need to set up your equipment properly. Follow these easy steps to ensure you’re ready to go:
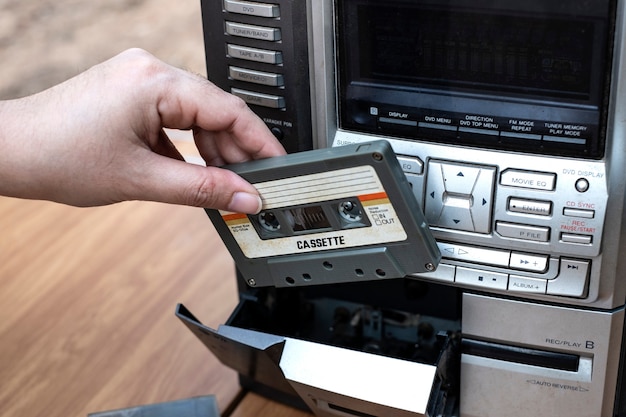
- Connect Your Cassette Player to Your Computer: Use RCA cables to connect the cassette player’s “Line Output” to your computer’s “Line Input” or “Microphone Input” jack.
- Install Your Audio Recording Software: There are various software options available for cassette-to-CD conversion. Audacity is a popular, free option for both Windows and Mac. You can download it from the official website.
- Configure Your Recording Settings: Once your software is installed, it’s time to configure the settings for optimal recording quality. Set the input source to “Line In” or “Microphone In”. Choose “WAV” as the file format for the highest quality recordings.
Cleaning And Preparing Your Cassette Tapes
Before starting the transfer process, it’s essential to properly clean and prepare your cassette tapes to ensure the best possible audio quality. Follow these steps to properly clean and handle your videos:
- Clean the tape heads: Use a cotton swab dipped in rubbing alcohol to gently clean the tape heads. Be careful not to damage the delicate parts of the tape mechanism.
- Clean the cassette shell: Use a soft cloth or cotton swab to gently clean the cassette shell. Avoid using water or any harsh chemicals that may damage the plastic casing.
- Store tapes properly: When not in use, store your tapes in a cool and dry place away from direct sunlight and heat. Avoid stacking tapes on top of each other as this can cause warping or damage.
- Handle tapes with care: When handling your tapes, always hold them by the edges and avoid touching the exposed tape or the tape heads. This can cause smudging or damage to the audio quality.
“Proper cleaning and preparation can help preserve the quality of your cherished audio memories.”
Recording And Saving Your Cassette Audio
Now that your equipment is set up and your tapes are prepared, it’s time to start the recording process. Follow these steps to capture the audio from your cassette tapes:
- Insert your cassette tape into the cassette player.
- Open your audio recording software on your computer.
- Select the option to record audio from an external source.
- Adjust the recording settings to your desired quality.
- Press the record button in your software and simultaneously press play on your cassette player.
- Monitor the recording progress and stop the recording when the desired audio has been captured.
Once the audio has been recorded, save the audio file to your computer in a format that is compatible with your CD-burning software.
Editing And Enhancing Your Recorded Audio
After recording your cassette audio onto your computer, you may want to edit and enhance the sound quality to make it more enjoyable to listen to. Here’s how you can improve your audio:
Remove Unwanted Noise
Use editing software to remove any unwanted hiss, hum, or background noise that may detract from the listening experience. You can also adjust the EQ settings to fine-tune the sound.
Adjust Levels
You may need to adjust the levels of your audio to balance out any loud or quiet sections. Use the editing software to boost or reduce the volume as needed.
Enhance Audio Quality
If your audio sounds muffled or lack clarity, you can use filters and effects to improve the sound. Experiment with different options and settings to find the right balance.
Remember to preserve the original sound as much as possible while making enhancements. Don’t overdo it and remove the character of the cassette tapes. It’s the imperfections that make them special.
Once you’re satisfied with the editing and enhancing, it’s time to move on to the next step: burning your audio onto a CD.
Burning Your Audio Onto A CD
Now that you have successfully recorded and edited your audio files, it’s time to burn them onto a CD. Follow these steps to create a playable CD:
- Insert a blank CD into your computer’s CD drive.
- Open your CD-burning software.
- Create a new audio CD project.
- Drag and drop your recorded audio files into the project.
- Organize the order of your audio tracks, if desired.
- Click “Burn” to start the burning process.
- Once the CD is burned, eject it from your computer and label it with the appropriate information, such as the artist’s name and album title.
It’s important to note that CD burning speeds and quality can vary based on a variety of factors, such as the type of CD and the computer’s processing speed. Be patient while burning your CD and monitor the process to ensure that it is successful.
Tips For Preserving And Archiving Your Cassettes
Now that you have successfully transferred your cassette tapes to CD, it’s important to properly preserve and archive them. Here are some tips and recommendations:
| Tip | Description |
| Store your original tapes in a cool, dry place | Humidity and heat can damage your tapes. Keep them in a room with consistent temperature and low humidity. |
| Keep your tapes away from magnets | Magnetic fields can damage your tapes. Store them away from speakers, motors, and other devices that use magnets. |
| Handle your tapes with care | Avoid touching the tape itself. Hold it by the edges of the case. Do not expose it to dust, dirt, or liquids. |
| Create backups of your CD recordings | CDs can also get damaged or lost, so it’s a good idea to have multiple copies. Store them in separate locations for extra security. |
| Consider seeking professional help | If you have valuable or rare tapes, or if you are not confident in your ability to transfer them, consider using a cassette-to-CD transfer service or a conversion kit. |
By following these tips, you can ensure that your cherished memories are preserved for years to come. Enjoy your newly transferred CD recordings, and don’t forget to create a backup!
Conclusion
Transferring your cassette tapes to CD is a simple and rewarding process that can help you preserve your cherished memories for years to come. By following the steps outlined in this guide, you can easily convert your old cassette tapes to a modern and easily accessible format.
Remember to gather the necessary equipment, clean and prepare your cassette tapes, and use recording and editing software to create high-quality audio files. Once your audio is recorded, edited, and enhanced, use CD-burning software to transfer it onto a CD.
Finally, remember to properly store and archive your original tapes to ensure they are preserved for future generations. Whether you choose to do it yourself or use a cassette-to-CD transfer service, transferring your cassette tapes to CD is a rewarding experience that can help you relive those special moments over and over again.
FAQ
Q: How Do I Transfer My Cassette Tapes To CD?
A: To transfer your cassette tapes to CD, you will need the necessary equipment and software. Follow our step-by-step guide in Section 1 for detailed instructions.
Q: What Equipment Do I Need For Cassette To CD Transfer?
A: You will need a cassette player or deck, a computer with a CD burner, and audio recording software. Alternatively, you can opt for a cassette to CD transfer service.
Q: How Do I Set Up My Equipment For Cassette To CD Transfer?
A: Section 3 of our guide provides step-by-step instructions for connecting your cassette player to your computer, installing the necessary software, and configuring everything for the transfer process.
Q: Should I Clean And Prepare My Cassette Tapes Before Transferring Them To CD?
A: Yes, it’s important to clean and prepare your cassette tapes properly. Section 4 covers best practices for cleaning your tapes and tips for handling and storing them to ensure optimal playback quality.
Q: How Do I Record And Save My Cassette Audio To My Computer?
A: Section 5 walks you through using recording software to capture the audio from your cassette tapes and save it to your computer.
Q: Can I Edit And Enhance My Recorded Audio?
A: Yes, Section 6 provides instructions on using editing software to remove unwanted noise, adjust levels, and enhance the overall audio quality while preserving the original sound.
Q: How Do I Burn My Recorded Audio Onto A CD?
A: In Section 7, we guide you through using CD-burning software to create a playable CD from your recorded audio files.
Q: How Can I Preserve And Archive My Cassettes?
A: Section 8 offers tips for properly preserving and archiving your original cassette tapes, including suggestions for storage and creating backups of your CD recordings.
Q: What Is The Conclusion Of This Guide?
A: In conclusion, transferring your cassette tapes to CD is a straightforward process that can be done with the right equipment and software. Follow the steps outlined in this guide to preserve your cherished memories and enjoy them in a more modern format.
Read Also: